如何使用Hexo搭建属于自己的博客
如何使用Hexo搭建属于自己的博客
一、准备工作
- 申请
GitHub账号 - 安装
Git - 安装
NodeJS
二、创建仓库
在GitHub上创建一个新的代码仓库用于保存我们的网页。
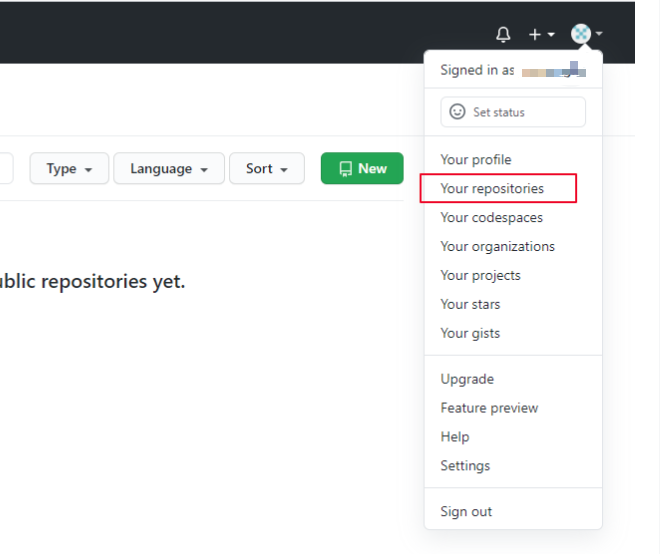
点击Your repositories ,进入仓库页面。

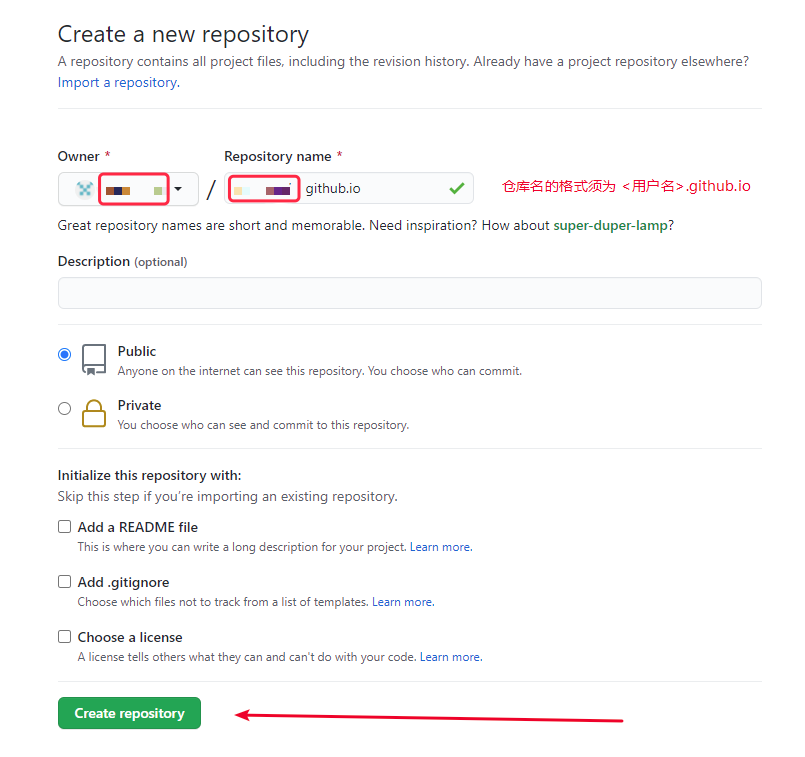
填写仓库名,格式必须为<用户名>.github.io,然后点击Create repository

三、安装Hexo
我们采用Hexo来创建我们的博客网站,Hexo 是一个基于NodeJS的静态博客网站生成器,使用Hexo不需开发,只要进行一些必要的配置即可生成一个个性化的博客网站,非常方便。点击进入https://hexo.io官网。
安装
Hexo1
npm install -g hexo-cli查看版本
1
hexo -v创建一个项目
hexo-blog并初始化1
2
3hexo init hexo-blog
cd hexo-blog
npm install本地启动
1
2
hexo g
hexo s浏览器访问 http://localhost:4000
四、更换主题
Fluid主题官网: https://github.com/fluid-dev/hexo-theme-fluid
指定主题
如下修改
Hexo博客目录中的_config.yml:1
2theme: fluid
language: zh-CN创建
关于页首次使用主题的
关于页需要手动创建1
hexo new page about创建成功后,编辑博客目录下
/source/about/index.md,添加layout属性1
2
3
4
5---
title: about
date: 2022-04-01 19:20:23
layout: about
---本地启动
1
2hexo g -d
hexo s浏览器访问 http://localhost:4000
五、创建文章
如下修改 Hexo 博客目录中的 _config.yml ,
打开这个配置是为了在生成文章的时候生成一个同名的资源目录用于存放图片文件。
1 | |
执行如下命令创建一篇新文章,名为 测试文章
1 | |
执行完成后在source_posts目录下生成了一个md文件和一个同名的资源目录(用于存放图片)
图片引用方法
1 | |
六、个性化页面展示
页面的标题等位置显示默认的文字,可以改下显示一些个性化的信息。
浏览器
tab页名称
修改根目录下_config.yml中的title字段。博客标题
主题目录themes\fluid下_config.yml中的blog_title字段。主页正中间的文字
主题目录themes\fluid下_config.yml中的text字段。
七、添加阅读量统计
Fluid 主题写好了统计阅读量的代码,但是缺少相应配置所以没有开启,需要借助三方服务来统计阅读量,
这里是有 Leancloud 的免费服务来进行统计。
申请
LeanCloud账号并创建应用
LeanCloud官网: https://console.leancloud.cn/login?from=%2Fapps创建应用,选择开发版即可,免费的
进入该应用的 设置->应用凭证,找到AppID和AppKey,记录下来后面配置要用修改
Fluid配置
打开主题目录themes\fluid下的_config.yml文件,修改如下配置
单篇文章阅读量计数 打开统计开关
1 | |
配置
leancloud的app_id和app_key打开计数功能,统计来源改为
leancloud
1 | |
- 页面底部展示网站的
PV、UV统计数
1 | |
八、添加评论功能
评论功能的代码已经写好了,只不过没有开启,需要修改一些配置
打开主题目录 themes\fluid 下的 _config.yml 文件,修改如下配置
启用评论插件
1 | |
配置 leancloud 的 app_id 和 app_key
九、发布到GitHub Pages
安装hexo-deployer-git
1 | |
修改根目录下的 _config.yml ,配置 GitHub 相关信息
1 | |
部署到GitHub ,可按以下三步来进行。
1 | |
十、一些常用命令
hexo 常用命令:
1 | |
git 常用命令:
1 | |
十一、最终效果展示
可访问如下地址查看 https://liaoliaocode.github.io
以上为 Hexo 搭建个人博客 全过程,详细内容请参考 Hexo Fluid 用户手册